How to Setup Your Real Estate Agent Facebook Page in 2024

Vetted by HousingWire | Our editors independently review the products we recommend. When you buy through our links, we may earn a commission.
While they may not be as trendy as they once were, a well-crafted real estate agent Facebook page is still the best way to generate leads on social media. Your Facebook page can help you build your personal brand, network with other agents across the country (hello, referral partners!) and even better, target both buyers and sellers with boosted posts and paid ads.
The numbers are pretty incredible: Facebook has over 3 billion active monthly users. And unlike TikTok, Facebook users actually buy and sell real estate. Millennials, who bought 38% of all homes sold last year, are the most active demographic on the site.
In this step-by-step guide, I’ll explain exactly how to set up your page to build your personal brand and start generating leads. I’ll also show you examples of my favorite real estate agent Facebook pages for inspiration.
Summary
15 inspiring real estate agent Facebook page examples
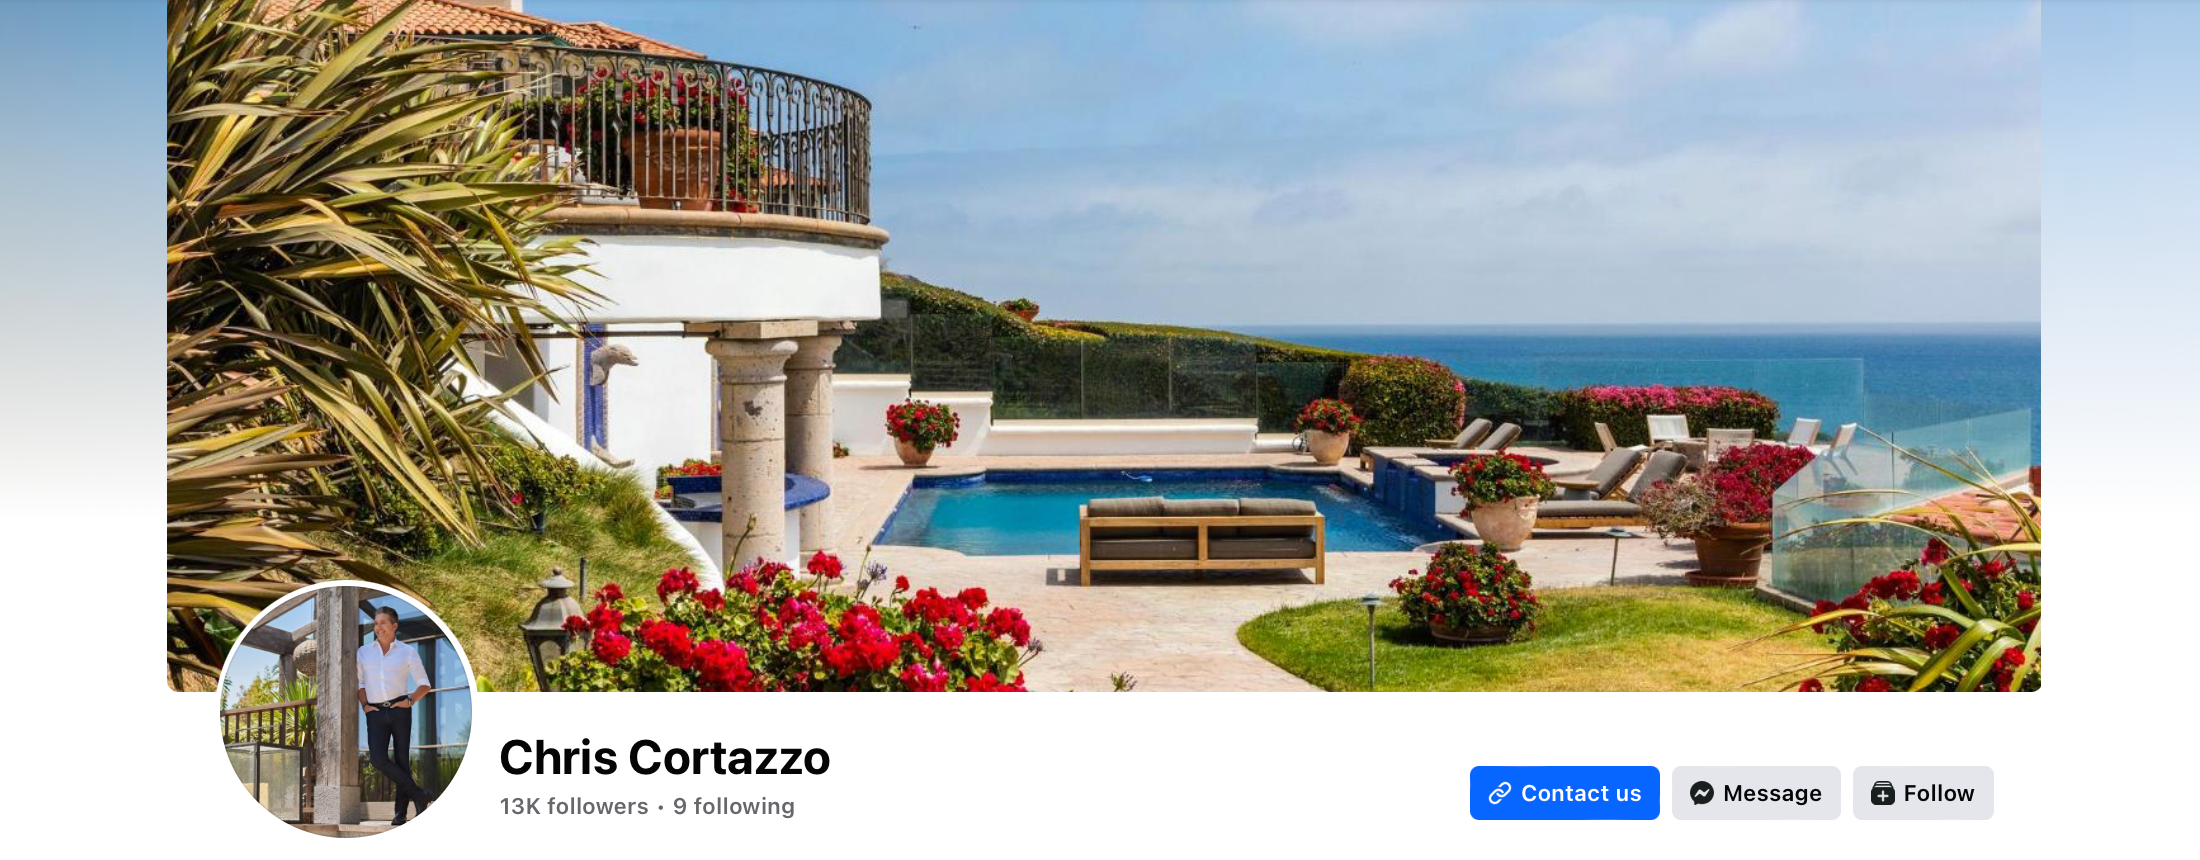
We curated some real estate agent Facebook pages we love — including Chris Cortazzo, Ryan Serhant, Jade Mills Estates and more. Some real estate agent Facebook pages showcase luxury homes or a style of home — while other agents choose to showcase their family, lifestyle, accolades, team members, market, brokerage brand, reputation or personality.
How to set up your real estate agent Facebook page in 9 steps
Here, we’ll walk you through the process and show you how to set up your real estate agent Facebook page, one step at a time.
1. Create your page from your business account
You can create a real estate agent Facebook page using your business account (now called business portfolio). If you don’t already have a business account on Facebook, check out Facebook’s guide to creating one.
Once you have your business account set up, go to your homepage. In the top right corner of the screen, click on the circular icon with your profile picture in it. It will give you a dropdown menu. Click “Create new profile or page.”
The next step is to choose the public page option. This is the best option for your business page. It is more professional, and a public page will help differentiate your business identity from your personal life. This is key for building your brand as a real estate agent.
After clicking “Next,” click “Get Started” to customize the page you created.

2. Add your page name and choose the appropriate category
This is where you’ll customize your page and make it your own!

Choosing a page name that reflects your personal brand
Choose a page name that is clear and concise. The goal of your page name should be to tell your audience that you sell real estate and where you sell real estate. You could also include any specific type of real estate you specialize in, such as new construction, working with first-time buyers or selling waterfront properties.
Your page name is the first place your audience will experience your brand, so choose a name that fits the brand you already have or are looking to build. Depending on your brand and personality, you could go more professional, like “Boston Real Estate Experts,” or more fun, like “Selling Boston” (a spin on Selling Sunset).
Think about the image you intend to portray and what feels authentic to you. Also, consider the audience you’re looking to reach. Would they respond better to a fun, playful image, someone they’d like to go have beers with after a day of showings? Or would they prefer someone more polished and professional who oozes expertise? The beauty of this is you get to choose your brand image and make it whatever you want!
Adding a bio
Adding your bio is not required, but I’d highly recommend utilizing this space to allow your audience to get to know you better. You can talk about your experience (either in real estate or in a related field, such as sales or marketing), the geographic areas you cover, and include any specialties you focus on, such as downsizing seniors or first-time buyers.
Choosing a category
Next is the category field. I’d keep it simple and just select “Real Estate” or “Real Estate Agent.” Then hit “Create page,” and you’re on the next step!
3. Finish setting up your page with your contact information and working hours
This is where you can add your contact information and the hours you choose to be available. On the left side of the screen, scroll down to add your contact information and business hours.

Tips to make your real estate agent Facebook page more polished and professional
- Website: Use your own website if you have one; otherwise, include your brokerage’s website. If you have your own bio page on their site, definitely link to that page specifically!
- Phone number: Include the phone number you want clients to call. Some real estate agents prefer to set up a Google Voice number, so if you have a separate business number, add it here.
- Email: Be sure to use your business email address. Anytime I come across an agent whose email is something like [email protected], they lose all credibility with me.
- Location: Use your office’s address, not your home address. This is for safety reasons and just to look more professional.
- Service area: Facebook allows you to select up to ten service areas (cities, towns, and even specific neighborhoods). This tells your audience where you will go to work with buyers and sellers. Only include areas you truly do cover, of course.
- Hours: While choosing “Always open” is tempting for most agents, I’d recommend selecting the “Open on selected hours”. This allows you to set expectations with potential clients about when you’re actually going to be available. Are you really going to take a call at 3 am? Unlikely. Here’s your opportunity to proactively tell the world your working hours.
Once you’ve completed all the fields, click next to finish customizing your page.
4. Add your profile picture, cover photo and action button
Your page is coming together now! The next step is to add your profile picture, cover photo and action button. These are extremely important elements of your Facebook business page. They allow people to connect with you and get to know your brand and style at a glance. The action button is a built-in Call To Action (CTA) feature that encourages potential clients to contact you directly.

Profile picture
You’ll want to use a professional headshot or lifestyle photo for your profile picture. I recommend choosing a photo that focuses on your face and shoulders so your audience can see your face when they’re viewing your page on their phone. The picture will be quite small, but seeing your face will connect you with your audience. Keep in mind that Facebook will automatically center the image for you and turn it into a circle.
You can try different options before committing to one, as the preview screen on the right side will update once you upload an image file.
Cover photo
The best real estate business page cover photos are either people or places. They’re more interesting than a logo or a stock image of a generic house. Choose an image that represents your business. A cool drone shot of a unique listing you sold, an image of your city’s skyline, or a professional group photo of your team are all fantastic options.
Cover photo image size
Facebook will allow you to adjust the position of your cover photo once it’s uploaded by clicking on the image, holding it, and moving it around until it’s centered. To format correctly, you’ll want to ensure the image is at least 400 pixels wide and 150 pixels tall; the ideal size is 820 pixels wide and 360 pixels tall. This image should be landscape, not portrait. I love using a design tool like Canva to create custom Facebook cover photos and choose specific dimensions.
Adding text to your cover photo
You could also add a slogan or your logo on top of the cover photo. Great for additional branding yet could distract from the cover photo itself, depending on what it is. You wouldn’t want your logo in the center of your city’s beautiful skyline; placing it in the bottom corner where it’s out of the way but still visible is a good option. Canva is the best tool for adding text to images. You can easily move the logo or slogan around, trying different placements on the image and finding what looks best.
Action button
This incredible feature of Facebook business pages is a game-changer for real estate agents! An action button is where your audience will click to contact you. It will show up at the top of your page. All successful marketing and advertising campaigns include a call-to-action, which is a direct invitation to contact you. Don’t skip this step!
Choose how you’d like to be contacted. My favorites are “Send message” or “Call now” because they increase your chances of having a two-way conversation with a lead. If you want to direct people to a welcome video on your website, there’s an option for that, too — the “watch now” button. You can always change this if you’re not seeing results, but for now, choose one and run with it.

Once you’ve chosen your button, click “next” then “save” then “next” again to proceed to the final few steps.
5. Connect WhatsApp to your page (optional)
If you’re already a WhatsApp user and want to use it for your real estate business, go ahead and connect your account to your business page by adding your phone number and clicking “connect.” Otherwise, I’d skip this step. WhatsApp may be useful if you’re in market with lots of foreign buyers. It’s the leading messaging app used by more than 2 billion users globally.

6. Preview your page
Double-check that everything on your page looks how you want it to look and make any edits you’d like. To see what your page looks like, first click the three dots on the right-hand side of the page. Then click “View As” to preview your page as your audience will see it:

Check to see if anything looks off with your page. Your headshot should be cropped properly (without cutting the top of your head off!), and your copy should be free from typos. Also, make sure to check your action buttons to see if they work.
Here’s what the finished real estate Facebook page I just created looks like:

If you’re happy with the way your page looks, you can move on to the next step: promoting your real estate agent Facebook page and setting up lead generation.
7. Invite your friends to follow your page
Here’s the exciting part! Telling the world you’re a real estate professional and inviting your Facebook friends to follow your new business page. This helps shift your friends’ mental image of you from your previous profession to a real estate professional. It also shows them you’re taking your real estate career seriously and that this is a legitimate business rather than a hobby.
Facebook will give you the option of inviting friends to follow your page during the process of setting it up. You will be limited to promoting your page to 1,000 people, which I suggest you take advantage of. The more people you send your page to, the more potential leads you’ll get.
Here’s what that looks like:

But I think it’s better to launch it, double-check that everything is correct, and then invite people. To invite your friends to follow your page after it’s all set up, you’ll click “Manage Page,” then click “Followers” and “Invite friends.”

When I set up my first real estate business Facebook page as a new agent, I was a classic overthinker. I analyzed every person and made assumptions about whether or not they’d want to follow my page. What I eventually learned was that it’s a numbers game.
8. Manage your notification settings
Almost done! This step lets you decide when you want to be notified and receive an activity alert on your page. You’ll see a red number on the bell icon in the top right corner of your screen — those are your notifications. Definitely keep your notifications on for your page so you don’t miss out when a lead contacts you. You can toggle off the marketing and promotional emails button, depending on whether or not you want to be notified about other products Meta offers for businesses.
Once you’ve determined your notification settings, click “Done.”

9. Take a tour of your new page
Congrats! Your Facebook real estate business page is now live! You can take a tour of your page to learn more about navigating it (I highly recommend it if this is your first Facebook business page). The tour will show you what the various buttons do and give you tips on how best to use your Facebook business page.

How to generate leads with your Facebook page
There are many ways to use your Facebook real estate business page to attract more buyers and sellers. The two best strategies are running ads and creating organic content.
Running ads on Facebook
Many highly successful real estate agents advertise on Facebook because there’s a lot of flexibility in how much you spend. You can target potential clients based on their demographics, interests and location. For example, you can deliver your ads to potential clients in a hyperlocal area.
With the right tools and partners, it’s straightforward to set up Facebook ads with your new real estate agent Facebook page. Agents can spend as little as $5 daily advertising and see results.
The two main ways to advertise on Facebook are boosting posts and running ads.
- Boosting a post means paying to show a specific post you’ve already published to a wider audience. This is a good option for a really engaging or important post that you want more people to see.
- Running ads means that you’ll create an advertisement that will appear in your chosen audience’s news feed. This might be an ad for your latest listing or an ad detailing a recent sale.
Save time (and headaches) by hiring the pros

Don’t have time to learn Facebook advertising? No problem! Top Producer’s Social Connect makes it easy. Their marketing pros handle all your Facebook advertising for you — so you can focus on your business. You’ll get 30 exclusive leads per month from Facebook for just $300. Even better, you’ll get automated nurturing tools to keep them warm.
Creating organic content for referrals
Tap into your existing network (remember those 1,000 people you invited to like your real estate agent Facebook page?). At least a few of those people will likely be looking to buy or sell real estate in the next year.
Adding your own creative content to your business page will help keep you top of mind with your friends, so they think of you when they need to move AND when they have a referral to send your way.
I’m sure you’re wondering what types of content to post. Keep it simple, engaging, and on-brand for you. Some examples:
- Video of you talking about your favorite cafes in the neighborhood
- Photos of interesting or unique things you find when showing houses or going on listing appointments. This past week, I was touring a home with three separate doors leading to an old potato cellar from 1921. That would’ve been a great post on my business page!
- Top three mistakes to avoid as a first-time buyer
The more you post, the more your Facebook friends will see you as a real estate professional and their go-to agent to hire and refer!
Facebook loves engagement, meaning likes and comments. By proactively liking and commenting on your followers’ posts, your posts will be viewed more often by those people. It’s part of Facebook’s algorithm. So don’t be shy about engaging on other people’s pages and profiles! Reciprocity is the name of the game.


